 how-to
How Do You Plan Landscaping for a New Construction Project?
Quick Summary
Plan new construction landscaping in five steps: assess the soil and site, remove debris and set grading and drainage, lay out hardscape and softscape, choose plants and irrigation, then sequence the work on a phased timeline. Doing these in order prevents redoing paid-for work and protects the roof and foundation.
- Equipment compacts soil deeper than a garden fork reaches, so test soil and loosen it mechanically before planting.
- Correct grading so water moves away from the foundation before any plants or hardscape go in.
- Set irrigation after grading and drainage, and direct spray heads away from siding and the roof line.
- Keep tall trees away from the roof edge, since they drop debris into gutters and shade the roof deck.
- Call for utility locates and mark water, gas, electric and sewer lines before any digging begins.
Table of Contents
- Step 1: Assess the Site and Soil After Construction
- Step 2: Clear Construction Debris and Set Grading and Drainage
- Step 3: Build a New Build Landscaping Plan Around Hardscape and Softscape
- Step 4: Choose Plants and Irrigation Suited to a New Build
- Step 5: Sequence the Work Across a Phased Timeline
- Booking Your Landscaping Consultation with M7 LLC
- Frequently Asked Questions
Landscaping for New Construction Projects: Where the Work Starts
Last Updated: November 2, 2026
New construction landscaping is the stage most homeowners underestimate. The lot has been cleared, the house is standing, and the yard looks like a field of compacted dirt and leftover debris. At M7 LLC, we treat that starting condition as the real project. Done in the right order, site preparation determines how well grass, plantings, drainage and hardscape perform for years.
the U.S. landscaping services market at $176.7 billion in 2026 IBISWorld Landscaping Services in the US Industry Analysis. That scale reflects how much of the work is now tied to new residential and commercial builds, where early decisions carry the most weight.
Below, we walk through the five steps we use to plan landscaping after a build, from site assessment through a phased timeline. The sequence matters. Planting before grading, or irrigation before drainage, usually means redoing work that was already paid for.
Step 1: Assess the Site and Soil After Construction
Start with what the construction crew left behind, and read the lot the way a roofer reads a roof deck: the surface tells you what is happening underneath, which is why new construction landscaping assessments often overlap with roof drainage checks. Heavy equipment compacts soil to depths that a garden fork cannot reach, and builder-grade topsoil is often thin, mixed with subsoil, or stripped of organic matter. Before choosing a single plant, test the soil and walk the lot to note low spots, standing water, and areas where equipment ran repeatedly. Read the step-by-step guide to preparing a residential site before landscaping begins.
A basic assessment covers five things: soil texture and compaction, drainage direction, sun exposure by zone, the location of utility lines, and how roof runoff leaves the house. Call for utility locates before any digging, and mark the paths of water, gas, electric and sewer lines on a site plan. Then trace where downspouts and gutters discharge, a new roof that sheds water correctly still fails the lot if that water lands in a low spot against the foundation.
Post-construction soil remediation is a step many homeowners skip. Construction activity can leave compacted subsoil, contaminated spots and poor topsoil, so soil should be tested and remediated before planting. Compacted subsoil can be loosened mechanically, and topsoil can be amended to improve its structure.
Watch out: if the lot slopes toward the house, no amount of soil amendment will fix the water problem, correct the grade and the roof drainage discharge point before you spend money on plants.
For a roofing contractor, this assessment is also a diagnostic window. Ponding near the foundation, saturated soil against the slab, and downspouts that dump at the base of the wall are the same conditions that drive foundation movement and, over time, roof-edge and fascia problems. Documenting them at the landscaping stage gives the homeowner a single site plan that serves both trades.
The article lists the core checks to run on a new build lot before any planting, with the timing and actions for each.
| Assessment item | What to check | Action |
|---|---|---|
| Soil compaction | Equipment-compacted subsoil | Test, then loosen mechanically |
| Topsoil quality | Thin, mixed with subsoil, or low in organic matter | Amend to improve structure |
| Drainage direction | Low spots and standing water | Correct grade before planting |
| Utility lines | Water, gas, electric, sewer paths | Call for locates before digging |
| Roof runoff | Where downspouts discharge | Redirect away from foundation |
Step 2: Clear Construction Debris and Set Grading and Drainage
Remove all construction debris before finish grading. Buried lumber, concrete washout, and plastic wrap create pockets that hold water and block root growth. Once the lot is clean, set the grade so water moves away from the foundation, which is the single most important drainage rule for new builds.
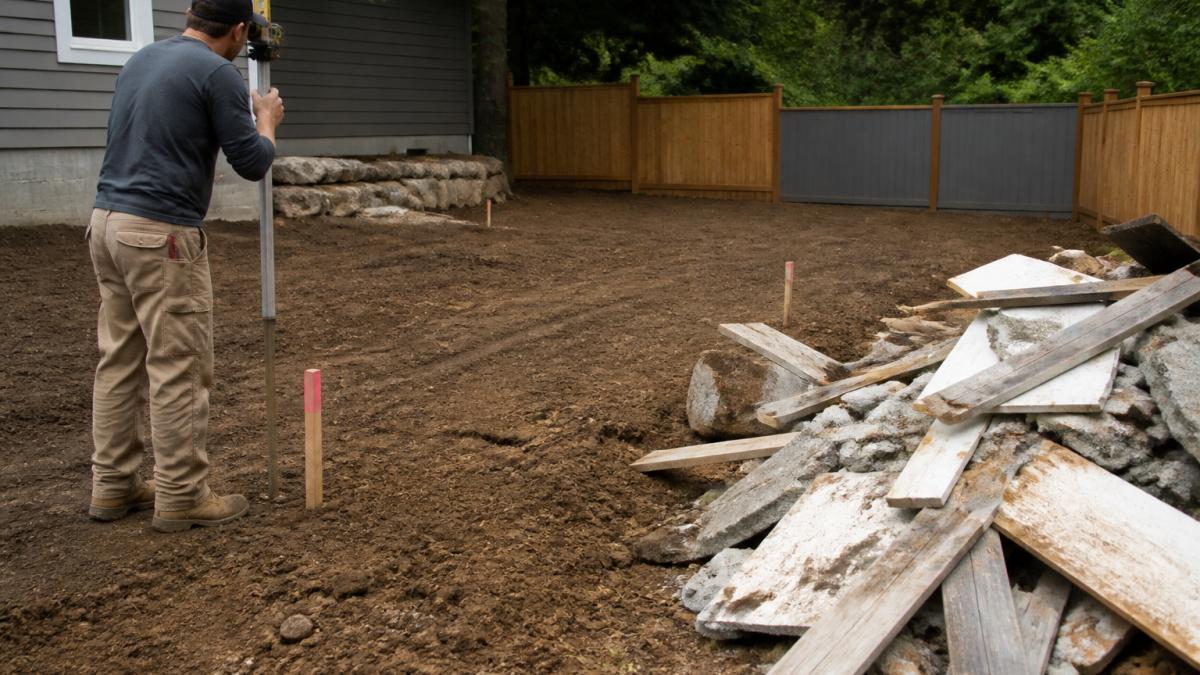
Poor grading is a serious problem. Water pooling against a foundation can cause long-term damage, and our guide on how to fix backyard drainage issues covers the common failure patterns in detail. For slopes and swales, plan the drainage path before any hardscape goes in.
You can review the warning signs in 7 signs poor soil grading is damaging your foundation if the lot already shows settling or wet spots near the house. Fixing grade after sod is down costs far more than setting it correctly now.
Step 3: Build a New Build Landscaping Plan Around Hardscape and Softscape
A new build landscaping plan balances hardscape (patios, walkways, retaining walls) against softscape (lawn, beds, trees, shrubs). Hardscape usually goes in first because it sets the boundaries and often requires excavation that would damage finished planting areas.
Map out the outdoor living space before committing to materials. Note where the patio will sit relative to the sun, where kids and pets will walk, and where the mulched beds and ground cover will meet the lawn. Erosion control matters on slopes, and retaining walls should be sized to the soil load behind them.
Plan the softscape around the hardscape so that beds and lawn edges finish cleanly. Mulching protects new plantings, suppresses weeds, and holds moisture while roots establish.
Step 4: Choose Plants and Irrigation Suited to a New Build
Plant selection for a new build depends on the soil you assessed in Step 1 and the plant zones on the lot. Native plants and well-chosen perennials and shrubbery generally need less water and adapt better to disturbed ground than exotic species. Group plants by water needs so irrigation zones can be run efficiently, and keep the tallest material away from the roof edge, trees planted too close drop debris into gutters and shade the roof deck in ways that shorten shingle life.
Irrigation and sprinkler system installation should follow grading and drainage, not precede it. Lay out zones on the site plan, keep heads clear of hardscape and utility lines, and set controllers for seasonal adjustments. A smart controller that adjusts to weather can reduce waste on a new lawn that is still establishing. Direct spray heads away from the foundation and the roof line; overspray on siding and fascia is a common source of rot that gets blamed on the roof.
Sod installation and hydroseeding both work on new construction, but each has different water and timing demands. Sod gives instant coverage at a higher material cost. Hydroseeding is less expensive per square foot but takes longer and needs consistent moisture during germination. Pricing depends on quantity, delivery distance and site access, so request a written quote from M7 LLC on the website for current pricing. Compare landscaping contractor quotes to see what each bid should include before you commit.
Newly planted trees and shrubs generally need deep, regular watering through their first growing season, and the watering schedule should be documented at handoff. Mulch should be kept a few inches back from trunks and stems rather than piled against them.
Set separate irrigation schedules for new sod and new trees during the first year, then consolidate them.
Step 5: Sequence the Work Across a Phased Timeline
Phased landscaping timelines keep the work in the right order and prevent crews from damaging finished areas. A typical sequence runs assessment and utility locates, debris removal and grading, drainage installation, hardscape, irrigation trenching, soil amendment, planting, and finally sod or seed.
Build in time between phases. Soil needs to settle after grading, and newly laid hardscape should cure before heavy traffic. Compressing these steps is the usual cause of schedule overruns.
Check local HOA rules and municipal requirements before design approval, since fence heights, tree placement, irrigation and drainage changes can all require sign-off. Raising these early avoids redesign after installation.
Booking Your Landscaping Consultation with M7 LLC
Planning a new build landscape is easier with a site visit and a written scope. M7 LLC provides professional construction and landscaping services for new construction, site preparation, and grounds work, and we can walk the lot with you before any work begins. Book a professional site excavation consultation to get a phased plan and a written quote tailored to your property.
Frequently Asked Questions
When should landscaping begin after construction?
Landscaping usually begins once rough grading is complete, heavy equipment has left the lot, and the house has a finished roof and exterior. Starting earlier risks damage from trucks and material deliveries, while waiting too long lets soil compact and erosion set in. Plan for a phased schedule so planting happens after final grading settles and any utility work is complete. Confirm the sequence with your general contractor before scheduling crews.
Is landscaping included in new construction?
Builders often include only basic grading and a rough lawn or seed in the base contract, so landscaping is frequently an add-on. Review your purchase or construction agreement to see what site cleanup, topsoil, sod, irrigation and plantings are covered. Pricing depends on lot size, soil condition, scope and timing, so request an itemized quote from M7 LLC on the website to compare against your builder's allowance.
How do you prepare soil for landscaping after construction?
Builder-graded lots often have compacted subsoil with little topsoil. Start with a soil test to check nutrient levels and pH, then loosen compacted areas and remove leftover construction debris. Add amendments and topsoil where needed, grade the surface so water drains away from the foundation, and allow the soil to settle before planting. Soil preparation done early prevents drainage problems and poor establishment later.